Source Connect (not to be confused with Source Connect Now) works best if you set up Port Forwarding on your router.
I have just replaced our router with a TP Link AX50 and this is how I configured it.
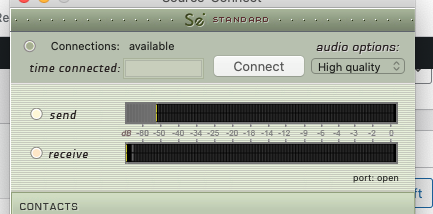
If you don’t have port forwarding setup correctly, when you have Source Connect running, below the meters you will see it says port: UPnP/PMP – and what you want it to be saying is ‘port open’.

So to set it up you need to do 2 things: 1. Assign a static IP address to the machine running Source Connect. 2 Set up Port Forwarding.
Log into your router. (usually 192.168.0.1)
Click on ADVANCED and then NETWORK in the left pane and then DHCP SERVER. In the DHCP client list make a note of the MAC Address and IP of your SC machine.
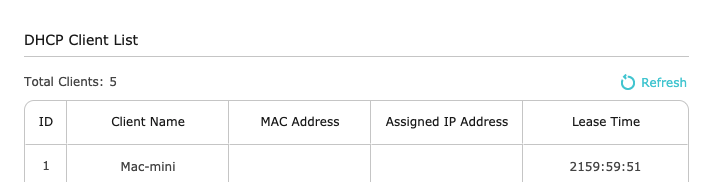
Then in the section above called ADDRESS RESERVATION – click ADD. And add the Mac Address and IP and enable it and save.
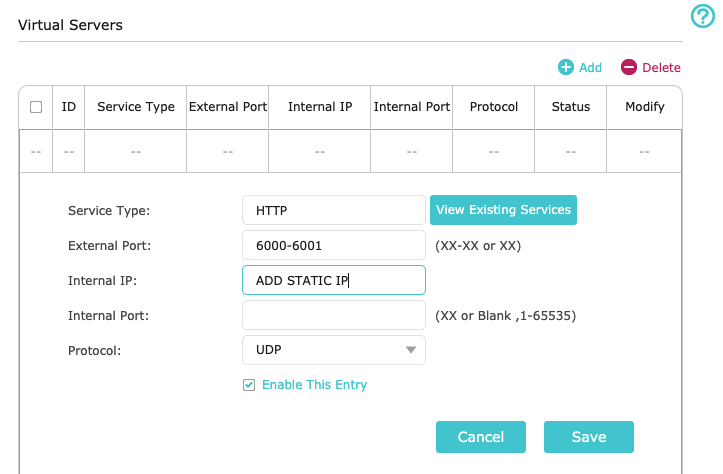
NEXT PORT FORWARDING
Click on NAT FORWARDING in the left pane and then VIRTUAL SERVERS. Click ADD. For service type choose HTTP, External Port 6000-6001, Add the static IP you just setup, leave internal port blank and make sure you select UDP as the protocol. SAVE. Log out and fire up Source Connect.
I’m no expert on this, so advise caustion before playing with the settings of your router, but this worked for me.
If it’s working correctly, when you open Source Connect – below the meters you should see: PORT OPEN.