I’ve been recording sound effects and soundscapes for 25 years, and over this time have used a variety of kit. Previous stereo kit has included a Sennheiser MKH 30/40(60) M-S array and HHB Portadat as well as my ‘trusty until it broke’ Sony D50 and I often use my back pocket kit which is a Tascam DR-05 with a pair of low noise Primo EM172s.
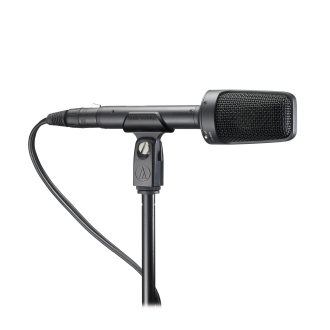
My current go to combo for going out into the field to record soundscapes comprises a Sound Devices MixPre-3, Audio-Technica BP4025 X/Y Stereo Microphone and the dependable Rode Blimp II. The Sound Devices MixPre-3 features in a separate blog post so I will concentrate on the BP4025 here.
The BP (Broadcast & Production) 4025 is a singe point large diaphragm stereo mic with an innovative coincident capsule configuration. Despite the angle of the capsules there is surprisingly no apparent energy drop in the centre front of the mic, and it produces an accurate wide stereo image with a really smooth detailed sound full of depth. For nature soundscapes, the low self noise of the BP4025 combined with the super quiet Kashmir preamps on the Sound Devices MixPre-3 can yield some excellent results. The compact size of the lightweight BP4025 also means it fits very neatly in the effective yet affordable Rode Blimp II, as well as being suitable for camera mounting.
Listen to some example nature recordings using the BP4025 in the video below
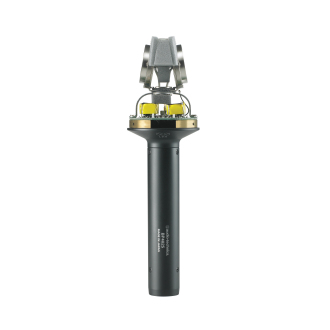
Large-diaphragm capsules offer pristine sound quality and exceptionally low noise Phantom power operation—for use with professional equipment Switchable low-frequency roll-off and 10 dB pad
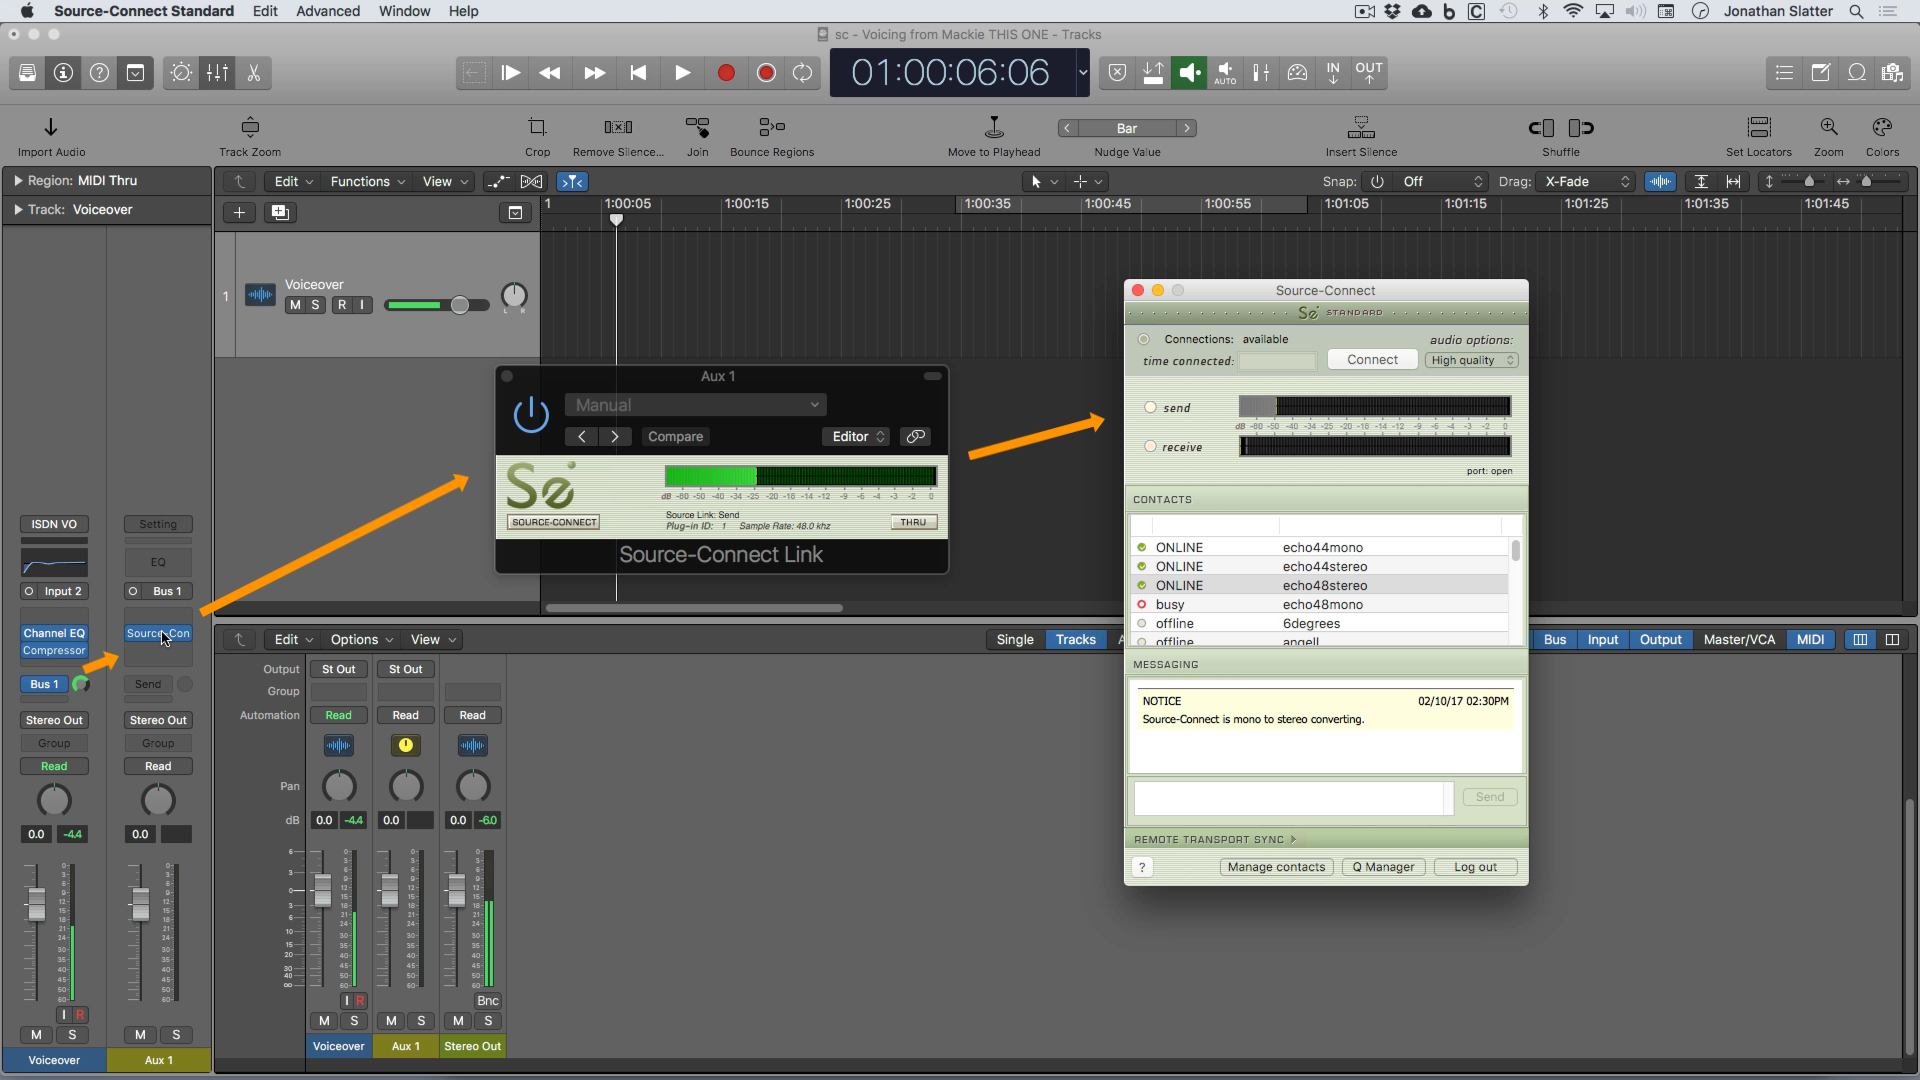
Source-Connect is an application produced by Source-Elements to enable two studios to remotely connect over the internet, and send and receive high quality audio. It’s the replacement for ISDN lines and codecs, and due to its excellent picture sync features, like RTS – Real Time Sync – it’s the go to app for the tv & film post production industry.
Using Source-Connect as a standalone product is a breeze, but what what about if you want to use the app with Logic Pro, or for that matter any other DAW? Well that’s easy too, with a plugin called Source-Connect Link, that is automatically installed when you install the software.
The Source-Connect Link plugin running in Logic Pro X
To connect your Logic Pro DAW to Source Connect is just a case of using an instance of Source-Connect Link and using a few busses and auxiliaries. Below are videos produced for Source Elements showing how to do it – including one how to use RTS (Real Time Sync) in Logic Pro. And at the bottom of the page there are 2 templates for Logic – one in stereo and the other in mono.
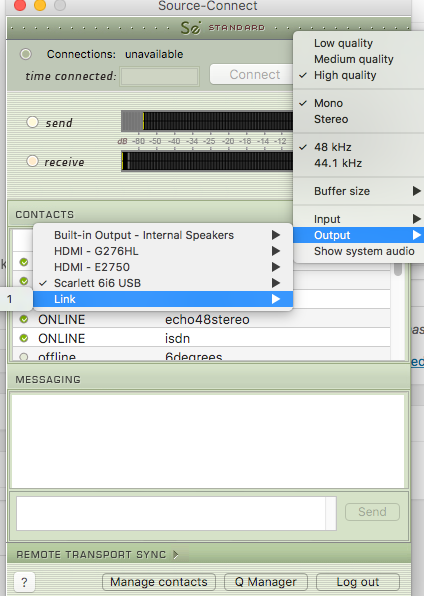
I came across a strange quirk of using the Focusrite 6i6 2nd Ed with Source Connect ‘Link’.
So I can route talkback mic and talent mic from within Logic X, I use the Source-Connect Link plugin which comes with Source-Connect.
Armed with the ‘ID’ number of the Source-Connect Link I have inserted, I can then route the audio in and out of the Link by selecting the ID number in the Audio Options of SC.
All fine except I have a strange problem where the output of SC will not route to the Link as expected if I select the Link ID when the previous selection was the Scarlett interface. The fix for me was to select the internal audio options for the input / output and THEN select link and for some reason that does it!
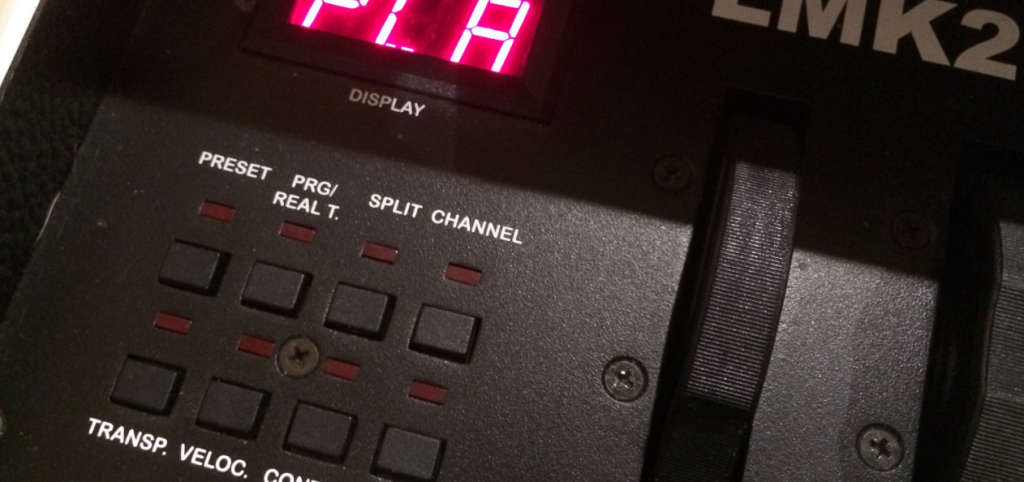
A quick start to setting up the excellent LMK2 midi keyboard made by Deopfer, to feel more realistic playing and recording piano. To find all the details of what this keyboard can do you can find the Doepfer manual here.
One thing to be wary of…Make sure you are not unintentionally using a preset which is duplicating the midi information on multiple channels, as you could end up with a nasty phasy sound if your sound source is set to receive on all channels.
Presets
There are 17 presets available to you. Presets 2 – 17 will revert to their factory settings when you turn the keyboard on…in other words you will lose any changes you have previously made. Luckily changes made to PRESET 1 will be remembered when you shut the keyboard down.
Here is a list of all the presets. If you look at say Preset 13, you can see this one will send out your note information on channel 1 and 2. To check which preset you are on, hit the preset button – if it’s ok just hit another button to clear it.
To change your preset you need to do the following:
Hit the preset button and hold down the C0 key and then C1 key an octave higher at the same time. Release and that combination will load load Preset 1. Pressing C0 & C#1 together will load Preset 2 etc.
Velocity Curves
If you want to keep the changes we’re going to make then load up Preset 1 so the keyboard will remember your changes for your next session.
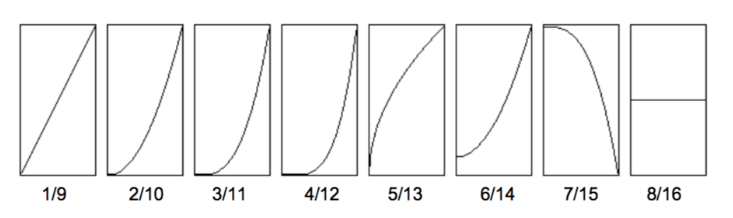
To get a nice piano feel to the keyboard which works with your piano samples, it’s worth trying out the various velocity curves that are available. There are 8 to choose from – and then importantly another 8 (9-16) which are the same as 1-8, except that with the second group, holding down a key very very gently will, like on a real piano, produce no sound. On 1-8 curves you can’t transmit a 0 velocity. I usually use 9, 10 or 11.
Here are the velocity curves from the manual: The set from 9 – 16 have the same curves but they allow you to press a key very gently without triggering a note – like on a piano – but not on an organ. So for piano recording I use 9, 10 or 11.
To change the velocity curve hit the velocity button and then as before hold down C0 and then C1 will be curve 1, C# curve 2 etc – so curve 10 is A1.
Splits
This defines the area of the keyboard designated to any of the 4 zones. So for my simple piano setup I just have zone 1 on channel 1 set to the whole keyboard.
To achieve this hit the ‘Split’ button at which point you will see the lowest note displayed with a number e.g. ’21’. When the display reads ‘Lo’ – hit your lowest key. The display should then display your highest key e.g. ’99’ and then ‘Hi’ – and you hit your highest key. Done.
This video tutorial looks at how to quickly edit a voiceover into individual regions using strip silence, and then in one pass, export those individual regions to separate audio files using the the Export Regions as Audio Files command.
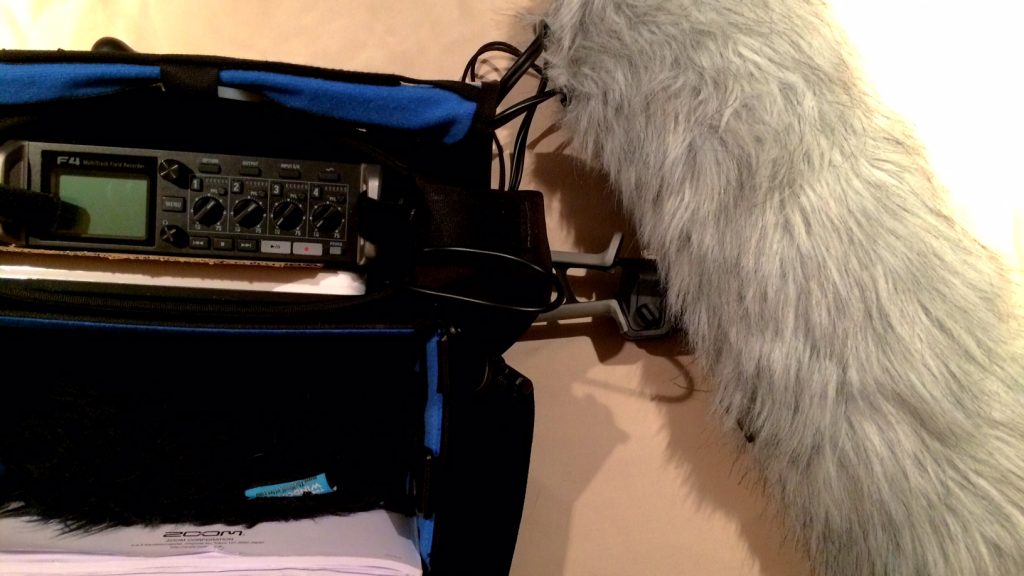
This recording of a dawn chorus in Bath in April 2017 was made using Audio-Techncia’s BP4025 stereo microphone. The mic was housed in a Rode Blimp II and the audio recorded with the Zoom F4. The mic has a very smooth high quality response and a wide stereo image and seems to have a very low noise floor. It’s quite an unusual mic for it’s size considering there are 2 large diaphragm capsules inside. The way they are mounted is explained on the Audio-Technica website:
Audio-Technica’s BP4025 stereo condenser offers large-diaphragm capsules in an innovative coincident capsule configuration. This allows for a smaller housing while producing an X/Y stereo image with the spatial impact and realism of a live sound field. Audio-Technica info.
As well as using Audio TX for ISDN voiceover sessions, I also turn to it for phone patch sessions – in other words, to connect to landlines and mobile phones where the client wants to listen in to a voiceover session on an ordinary phone. If you dial into Audio TX from a mobile or ordinary landline, (not through an ISDN codec) it will automatically configure itself into the G.711 codec required to make the connection. If you want to dial out you’ll need to select this option when you add a new contact.
But what about if you need to dial into a conference call where you need to send some DTMF tones to get into the right ‘room’… Audio TX doesn’t have this facility, but if you are on a Mac you might find it useful to know that you already have all the DTMF tones hidden away in a folder deep inside your system folder.
With your Mac routed to your Audio TX – just play the relevant DTMF tones (select the file and hit the space bar to play) and bingo – the conference door will open. So how to find them…on my Mac they are located here:
HD/System/Library/Components/CoreAudio.component – RIGHT CLICK (CTL) THIS ONE and then select ‘Show Package Contents’: then it’s Contents/SharedSupport/SystemSounds/Telephony – I’ve made a copy of this telephony folder somewhere less deep to make things easier.
The list of DTMF tones on your Mac. Note # is labelled dtmf-pound.caf
The Rode NT1 is an incredible microphone – incredibly quiet noise floor (5dBA), incredibly priced, looks and sounds great and unsurprisingly it’s incredibly popular.
The original NT1 was replaced by the NT1-A (anniversary edition) and now there is an all new dark grey NT1. Some people find the mic, especially the NT1-A, can sometimes be a little brittle and harsh – sibilant when working with some voiceovers & singers. Below is a video produced by Rode showing how to change your angle on the mic to reduce these problems.
This website uses cookies to improve your experience. We'll assume you're ok with this, but you can opt-out if you wish.AcceptRead More
Privacy & Cookies Policy
Privacy Overview
This website uses cookies to improve your experience while you navigate through the website. Out of these, the cookies that are categorized as necessary are stored on your browser as they are essential for the working of basic functionalities of the website. We also use third-party cookies that help us analyze and understand how you use this website. These cookies will be stored in your browser only with your consent. You also have the option to opt-out of these cookies. But opting out of some of these cookies may affect your browsing experience.
Necessary cookies are absolutely essential for the website to function properly. This category only includes cookies that ensures basic functionalities and security features of the website. These cookies do not store any personal information.
Any cookies that may not be particularly necessary for the website to function and is used specifically to collect user personal data via analytics, ads, other embedded contents are termed as non-necessary cookies. It is mandatory to procure user consent prior to running these cookies on your website.